Reverse Osmosis uses an advanced reverse osmosis method to ensure tasty and healthy drinking water.
The core of the unit is an automatically flushed RO membrane having 0.0001 microns precisions filtration. It can remove heavy metal, bacteria, bad mineral substance, dissolved matters, chemicals, etc.
Stages of filtration:
- The 1st Stage: Spun fiber to remove particles, sand, mud, dust and so on.
- The 2nd stage: There is a Granular carbon filter to eliminate organics, chlorine, turbidity, smell, odor, etc.
- The 3rd Stage: Block carbon filter removes organics, turbidity, smell, and odor, etc.
- The 4th Stage: RO membrane removes dissolved metal, bacteria, salt, chemicals, dissolve matters and other minerals in the water.
- The 5th Stage: Post carbon filter is used to remove dissolved gasses
Site Selection for major system components
One can set the RO system under a sink. People can set up this flexible design in other locations. They have space limitations or some other reasons.
At the time of selecting the location access to a cold water line. Besides easiness of filter replacement is an important factor to consider. One needs to set up all tubing and components far from direct sunlight or exposed to freezing temperature.
- Gooseneck faucet: The faucet must install nearby descend where drinking water is found easily at the edge of the sink. The important considerations are an unobstructed open space beneath the sink and convenience of usage. A ¾ inch diameter hole is a must on the flat surface for the installation of the faucet. The thickness must not surpass 1-1/4 inch.
- Pressure Tank: The pressure tank must set up the place where it becomes useful normally within 10 feet of the faucet. The nearest cabinet or the beneath the sink is the best place to do it. The weight of the tank is 30 pounds if it is full of water. So a level and firm area is a must to keep it. If you keep the tank remotely, a long run of tubing is essential. The tubing must be 3/8 inch outside diameter to lessen pressure drop.
- R.O. Unit: The best place for setting up the RO system is under the sink or inner side of the desk. The suitable place is the right part of all the tubing may be towards the opposite of the cabinet and out of the way. One can set the RO system to the remote place. Select a place where drain access and cold water is useful. The mounting location must have enough clearance for water cartridge changes.
- Supply Water Connection: One needs to set up the supply water valve as near as the Reverse Osmosis unit as you can. Use only portable cold water. Softened water expands the life of the RO membrane.
- Drain connection: Wastewater from the RO system has to go to a drain. If it goes to a standpipe or utility sink, one needs to keep a gap more than one inch above the rim. It is better not to connect the system drain line with the dishwasher or close to the garbage disposal. The back pressure from the unit may cause air gap to overflow.
Installation of RO Water Purifier
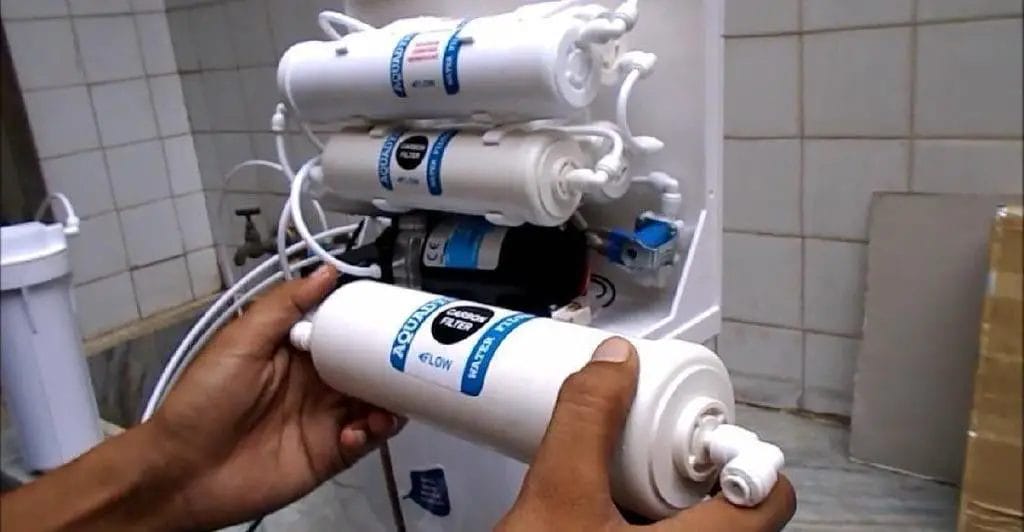
Installation Steps – How To Install RO Water Purifier
All plumbings should be accomplished under the limited plumbing codes and state. Some municipalities demand installation by the licensed plumbers. For more information, find out your nearer plumbing codes.
- Faucet Installation
As the sink comes with a sprayer, this can separate the installation of the faucet. A plug or pipe cap needs to seal sprayer connection. Sometimes sprayer may leave beneath the sink.
Be sure there is nothing under the faucet to interfere with. Then make a faucet mounting hole. For doing so two inches flat exterior is needed, not more than 1-1/4 inch thickness.
The faucet must be kept, so it gaps into the spout swivels and the sink for convenience. As there is a hole to put up the RO faucet, you need no drilling. Move ahead with raising the faucet.
Installation systems for Porcelain, Enamel, Ceramic on Metal, or Cast Iron:
Caution is essential for penetrating the porcelain of the metal stand.
Procedures:
- Indicate the center by the center blow for making ¼ inch pilot hole.
- Use big masonry and metal cutting to make a big pilot hole until it becomes half an inch.
- By masonry, pit drill pilot hole carefully through stop and porcelain if metal shows.
- Switch the bit with a normal metal cutting fragment to constantly cut inside the metal under the pottery surface.
Installation procedures for stainless steel sinks
Methods
- Drill the pilot hole.
- Mark the middle with a center blow for the 1/4″ pilot hole.
- Clean up sharp edges.
- Continue to increase hole by the bigger size bit as long as it is 1/2″.
Note: Some municipalities demand air gap faucets. These faucets need a 1-1/4 inch gap in the sink. Though half inch hole is a must to add the RO system. For making ¼ inch hole special tools, one needs to place an air break faucet as a chassis blow. For more information, you can ask your dealer.
- Mounting the Faucet
Separate hardware from the treated shank. Rubber washer and chrome base plates glide up the stem with the body of the faucet.
Feed yarned shank inside the sink gap and adjust the faucet. Then from under the sink, glide lock washer as well as hex nut on threaded shank. And finally, tighten it by using a wrench.
Note: It will be better if someone holds the faucet from the up of the sink for keeping it in its place. If it is impossible to tighten the hex nut as long as it is little less than totally tight. Then revolve the faucet base from the sink. Finally, tighten it at the time of familiarizing the faucet to the aimed position.
- Angle Stop Valve and Tubing Installation
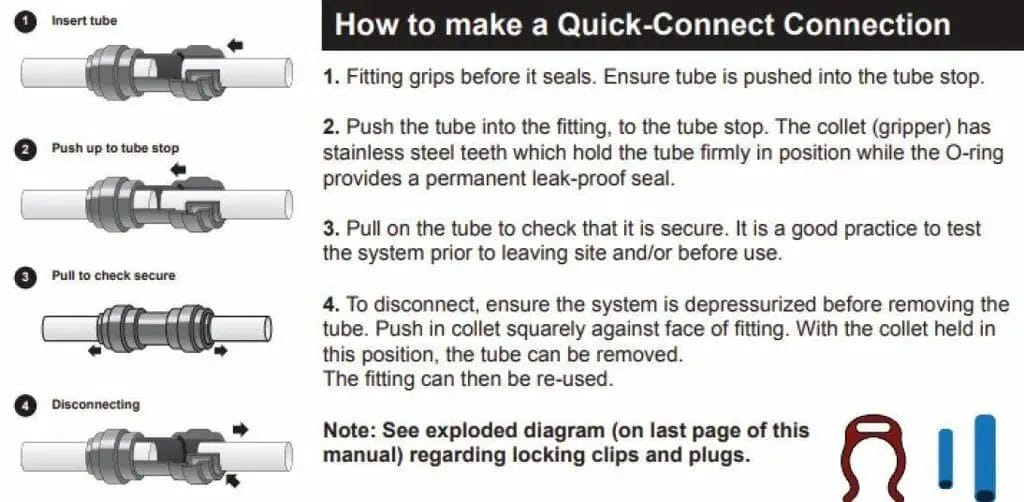
The John Guest Angle Stop Valve ensures easy, the simple link between the underneath riser tube and the angle stop. The angle stop valve gives the feed supply link for the RO system. It has also built in shut off system.
Installation system
- Close the flow of cold water by using the position stop shut off situated beneath your sink.
- When the valve shuts off, remove the force by exposing the handle of your faucet into cold water side.
- Take out tubing from the valve to create space for the John Guest Angle stop valve.
- Use the added wrench and separate the riser pipe from the remaining cold water shut off
- Add the swivel finish of John guest angle stop valve with the threads of the cold water close. Use hand to connect it.
- Add the riser tube with the male end of the John guest angle stop valve. Then tighten it with the wrench.
- Add a length of ¼ inch tubing between John guest fitting on the inlet of the RO unit and the angle stop valve.
- Drain Saddle Valve Installation
A drain saddle makes a connection with wastewater beneath the sink. It is made to adjust round a standard 1 to half inch OD drainpipe. The drain saddle valve must be set up before the p-trap or on a horizontal or vertical drain. It is better not to set up the drain lumber close the garbage disposal. Give up clogging the drain streak with debris.
Installation process
- Keep the drain lumber valve to the desired location and indicate the opening.
- Drill ¼ inch hole at indication by 1 side of the pipe.
- Take out the gasket and keep glue surface to the right half of the drain clamp round the hole.
- Placed both 1/2 of the drain burden to the drain pipe, therefore, the opening aligns along with drill hole. Apply a little drill crumb to confirm that drain fasten is accurately united.
- Set up drain saddle fasten on the valve by nuts and bolts given with.
- Initial Tubing Connections
For the advantages of the beneath sink installation, it is advised to finish beneath sink tubing connection.
- RO Component Installation

At first set up RO membrane O-ring end, sediment pre-filter and carbon pre-filter in vertical level housings.
Sure that RO membrane is pressed into the membrane housing as much as it goes. The suggestion is to use gloves on hands to handle the membranes and filters.
- RO Unit Installation
The RO unit is set up on the left, or right sink cabinet sidewall relied on where the supply tank is set to be located. Normally the unit is set up to before the cabinet as well as the tank to the rear.
To set up the unit, raise this at least two inches off the ground. Then plane it and identify the site of rising holes required.
Make a hole to set up the screw and raise screws permitting the raising bracket slot to trip over them.
Note: When sidewalls of the cabinet are not perfect, the unit may take place on the ground with screws applied to stay. It remains next to the cupboard in an upright position.
- Pre-Fill and Supply Tank Placement
Pre-filling the storage tank is suggested as it has enough pressure to notice leaks. Besides, water blush with the carbon filters.
To do it, add the connect line which may provide the RO unit straight to the bladder reservoir. For this, a 3/8″ x 1/4″ reducer comes with the unit.
Fill up the bladder with water as long as it stops. Then close the valve of the tank and shut off feed pressure. Get free the tube away from the reducer and free the reducer from the valve of the tank.
The supply tank must be set beneath the counter or within ten feet of the RO unit.
Note: With air at 7 psi tanks are pre-pressurized.
- Final Tubing Connections
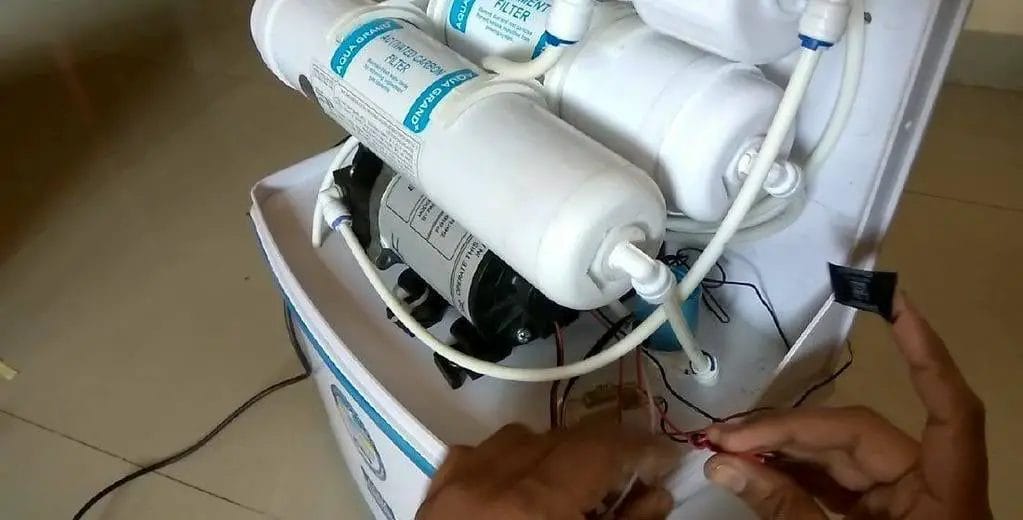
Keep all the components in the right place and finish the tubing connection by following the guidelines.
- Be confirmed that there is no crimp in the tubing.
- Tubing must chase contour of the cabinet.
- Use square cut and cut the tub to accurate length or an exact cutting tool
- The drain line is nothing but a short tube about ¼ inch ads with the membrane housing. There is a 3 inches cylindrical drain flow restrictor through the tube. This is the place where the drain streak connects to the RO unit. Please do not take out the flow restrictor since it may cause failure of the system.
- Keep tubing to the tank from the RO unit and short as much as you can to ensure good flow
Start up your RO system
- Open the goose faucet.
- Notice if there is any leak in the system
- Begin cold water supply and feed water as much as need. But close the tank ball valve.
- Just after five minutes, water may start to drip out of the faucet. Let it drips for ten minutes. After that turn off the faucet and open the valve of the tank.
To fill the pressure tank, it will take about 4 hours up to the pressure of local water. Do not drink the water of the first tank comes from the newly purchased system.
- If the tank is full, flush the system by exposing the faucet. The water tank is total releases and slows to a trickle.
- Start the faucet and fill the tank again. This process will take about 3.5 hours.
- Now the second tank is filled with water. You may drink purified water.
- See any leaking daily and after the first week do it periodically after a week.
- You may get milky water for the first few days. Within few days it will remove from water. They are a small air bubble in water coming from the filters. They are safe and normal. These bubbles are time to consume.
Maintenance of RO Water Purifier
1. Change the filter cartridges
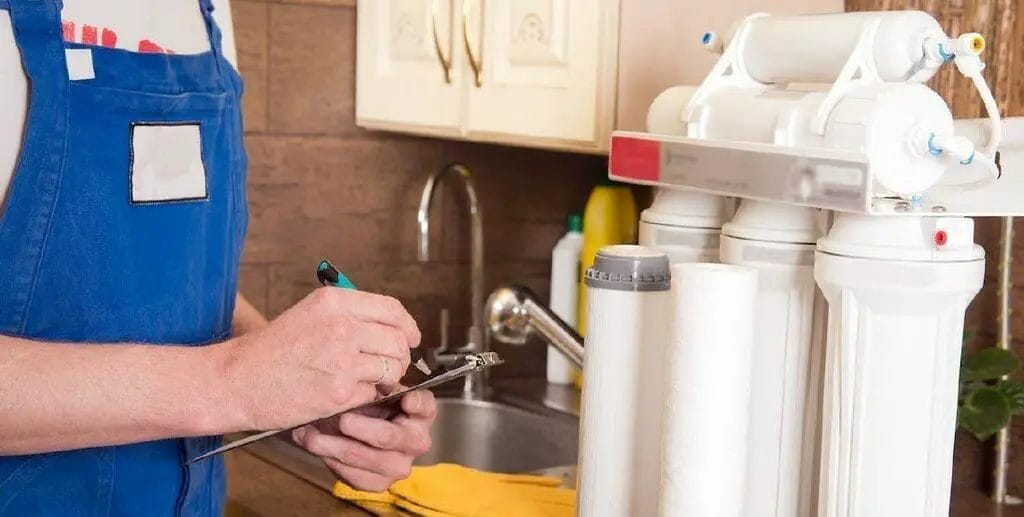
Practice the give wrench. Stop the water supply valve as well as the tank valve. Turn on the faucet and release pressure. Again use the wrench to take out the filter cartridge house.
NOTE: At the time of removing the cartridge, little water can spill out.
Remove the filter cartridges and start the system and notice for leaks.
2. Modify the membrane
Shut off the tank ball valve and the water supply valve. Turn on the faucet and remove pressure. Use unscrewing hex water tube nuts to remove the membrane assembly. Work with a bucket or sink to disassemble the external housing.
The membrane assemblies to replace and remove the membrane. Then reassemble it once again. Reset the housing by the new membrane with the RO system.
NOTE: Membranes and filters are fragile. Their duration of life depends on consumption rate and water supply.
You have no desire to use the system for a long time. Kindly disconnect the power supply, drain the tank and stop the water supply.
RO+UV+UF+TDS Water purifier: How to Install Guide Kent Pearl
Sarah J. Gregory
352 Hershell Hollow Road
Anaheim, CA 92805


